The internet has evolved a lot since it’s inception with the initial intend to serve as a means to link hypertext documents together. The browser is now as capable as anything and when chrome WebGL support was introduced in 2011 we opened the portal to another dimension for the web.
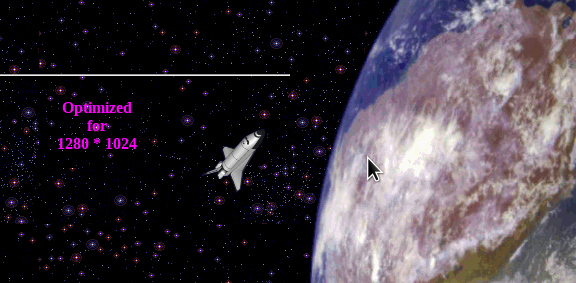
Microsoft introduced the concept of DHTML (Dynamic HTML) with the release of Internet Explorer 4 in 1997. This first step away from static contents allowed you to dynamically size and move things around, E.g. like the space-shuttle and the satellite on my first homepage.

In 2008 the first working draft of HTML5 came out and with it the beginning of the end of Flash. Two new technologies in particular caused a lot of excitment in the web development community. SVG, and Canvas ( 2D-Context only ).
Finally in 2011 Google introduced WebGL as the 3D context of the canvas element on all platforms. By now ( 2017 ) all browsers support one of the WebGL standards ( v1.0 or v2.0 ) , after all 6 years is an eternity for the internet. You can count on hardware accelerated 3D graphics rendering on mobile devices as well as on the desktop browsers.
Please check here for your current browser.
Welcome to the world of 3D
WebGL is rendered in hardware and is thus quite fast and capable. Aside from writing your own games you can also use it like any other graphic asset on your web page and E.g. use it as your dynamic, über-cool 3D background.
The only thing you will have to keep in mind is the performance of your visitors computers / mobile devices.
Three.JS, ShaderToy and WebGL
In this episode I am going to develop a 3D animated background in POJS ( Plain Old JavaScript ), as well as in QooxDoo. The goal is to use one of the demos from ShaderToy, convert it to Three.JS and utilize it inside a canvas – tag with a 3D-Context.
Well if the last sentence was too much for you, don’t worry I will go through all details of this in the next few paragraphs.
But first lets have a look at the individual tools and technologies.
WebGL
As previously stated WebGL became part of the browser in 2011. In order to create a simple scene you have to write a bunch of JavaScript code
<!DOCTYPE html>
<html>
<head>
        <title>Basic WebGL</title>
</head>
<body>
<script type="text/javascript">
function shaderProgram(gl, vs, fs) {
        var prog = gl.createProgram();
        var addshader = function(type, source) {
                var s = gl.createShader((type == 'vertex') ?
                        gl.VERTEX_SHADER : gl.FRAGMENT_SHADER);
                gl.shaderSource(s, source);
                gl.compileShader(s);
                if (!gl.getShaderParameter(s, gl.COMPILE_STATUS)) {
                        throw "Could not compile "+type+
                                " shader:\n\n"+gl.getShaderInfoLog(s);
                }
                gl.attachShader(prog, s);
        };
        addshader('vertex', vs);
        addshader('fragment', fs);
        gl.linkProgram(prog);
        gl.getProgramParameter(prog, gl.LINK_STATUS);
        return prog;
}

function attributeSetFloats(gl, prog, attr_name, rsize, arr) {
        gl.bindBuffer(gl.ARRAY_BUFFER, gl.createBuffer());
        gl.bufferData(gl.ARRAY_BUFFER, new Float32Array(arr),
                gl.STATIC_DRAW);
        var attr = gl.getAttribLocation(prog, attr_name);
        gl.enableVertexAttribArray(attr);
        gl.vertexAttribPointer(attr, rsize, gl.FLOAT, false, 0, 0);
}

function draw() {
        var gl = document.getElementById("webgl").getContext("experimental-webgl");
        gl.clearColor(0.8, 0.6, 0.4, 1);
        gl.clear(gl.COLOR_BUFFER_BIT);

        var prog = shaderProgram(gl,
                "attribute vec3 pos;"+
                "void main() {"+
                "       gl_Position = vec4(pos, 2.0);"+
                "}",
                "void main() {"+
                "       gl_FragColor = vec4(0.4, 0.6, 0.8, 1.0);"+
                "}"
        );
        gl.useProgram(prog);
        attributeSetFloats(gl, prog, "pos", 3, [
                -1,  0, 0,
                 0,  1, 0,
                 0, -1, 0,
                 1,  0, 0
        ]);
        gl.drawArrays(gl.TRIANGLE_STRIP, 0, 4);
}

function init() {
        draw();
}
// Wait for 100msec ...
setTimeout ( init, 100 );

</script>
<canvas id="webgl" width="400" height="200"></canvas>
</body>
</html>
Three.JS
Three.js was first released by Ricardo Cabello ( Aka MrDOOB ) to GitHub in April 2010.
It is released under the MIT license and became the de-facto standard for web based 3D programming in no time.
The reason is that three.js adds an abstraction layer on top of WebGL which allows you to program it more as you would expect it to be.
Below is a Three.JS powered “Hello World” example.
<!doctype html>
<html>
<head>
        <title>Three.JS Hello World</title>
</head>
<body style="margin: 0; overflow: hidden; background-color: #000;" >
        <div id="webgl"></div>
        <script src="three.min.js"></script>
<script>

        var webglEl = document.getElementById('webgl');
        var width   = window.innerWidth;
        var height  = window.innerHeight;

        // Earth params
        var radius   = 0.5;
        var segments = 32;
        var rotation = 6;

        var scene = new THREE.Scene();
        var camera = new THREE.PerspectiveCamera(45, width / height, 0.01, 1000);
        camera.position.z = 1.5;
        var renderer = new THREE.WebGLRenderer();
        renderer.setSize(width, height);
        scene.add(new THREE.AmbientLight(0x333333));
        var light = new THREE.DirectionalLight(0xffffff, 1);
        light.position.set(5,3,5);
        scene.add(light);

        var sphere = createSphere(radius, segments);
        sphere.rotation.y = rotation;
        scene.add(sphere)

        var clouds = createClouds(radius, segments);
        clouds.rotation.y = rotation;
        scene.add(clouds)

        var stars = createStars(90, 64);
        scene.add(stars);
        webglEl.appendChild(renderer.domElement);
        render();

        function render() {
                sphere.rotation.y += 0.0005;
                clouds.rotation.y += 0.0005;
                requestAnimationFrame(render);
                renderer.render(scene, camera);
        }

        function createSphere(radius, segments) {
                return new THREE.Mesh(
                        new THREE.SphereGeometry(radius, segments, segments),
                        new THREE.MeshPhongMaterial({
                                map:         THREE.ImageUtils.loadTexture('images/2_no_clouds_4k.jpg'),
                                bumpMap:     THREE.ImageUtils.loadTexture('images/elev_bump_4k.jpg'),
                                bumpScale:   0.005,
                                specularMap: THREE.ImageUtils.loadTexture('images/water_4k.png'),
                                specular:    new THREE.Color('grey')
                        })
                );
        }

        function createClouds(radius, segments) {
                return new THREE.Mesh(
                        new THREE.SphereGeometry(radius + 0.003, segments, segments),
                        new THREE.MeshPhongMaterial({
                                map:         THREE.ImageUtils.loadTexture('images/fair_clouds_4k.png'),
                                transparent: true
                        })
                );
        }

        function createStars(radius, segments) {
                return new THREE.Mesh(
                        new THREE.SphereGeometry(radius, segments, segments),
                        new THREE.MeshBasicMaterial({
                                map:  THREE.ImageUtils.loadTexture('images/galaxy_starfield.png'),
                                side: THREE.BackSide
                        })
                );
        }

</script>
</body>
</html>
As you can see, using Three.JS we can achieve much more with about the same number of lines. That is not to say that it is not possible to create amazing things in WebGL in just under 100 lines of code, however the best would be if you combine both approaches.
Please feel free to visit the main web page for Three.js and spend some time browsing the available samples. I am certain that you will discover some joy and wonders on this web page. In case you don’t know where to start. This is a perfect place to spend about 19 minutes of your existence, to remember the fallen.
Now let’s look at another favorite of mine. This time it is a web page to show off …
ShaderToy wonderland
If you visit the Shadertoy.com – web page, you will find a thousands of cool demos, including some small games, all written utilizing the graphics card hardware accelerate shader pipelines.
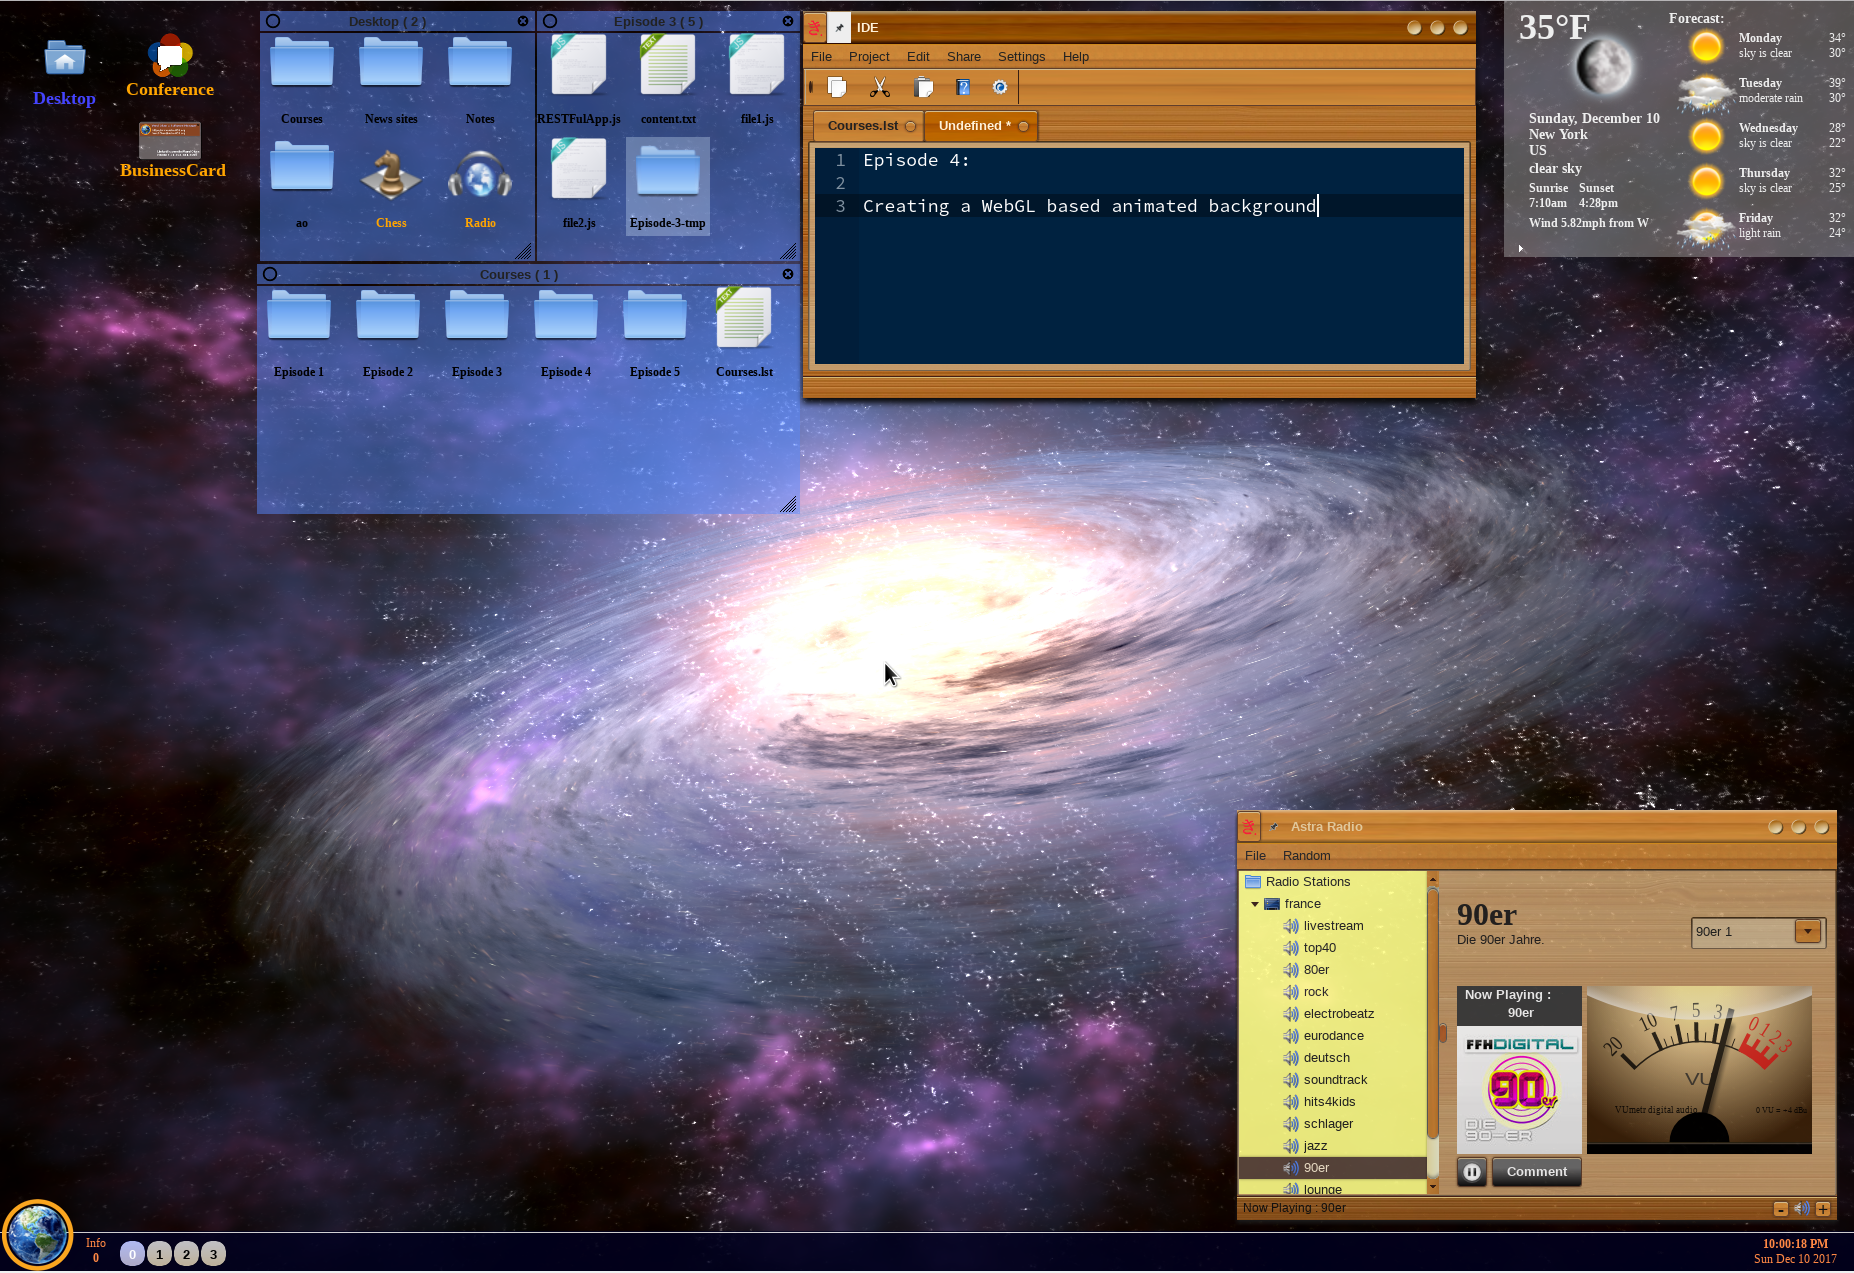
What I wanted to achieve in this episode of teaching JavaScript was to add this toy by Frankenburgh  as a background to AstraNOS. Some minor adjustments, like no sound and no story telling ( yes if you watch the original long enough you will get the story ), just an ever spinning Galaxy …
ShaderToy and Three.JS combination
In order to marry those two we have to know the data required for ShaderToy to work and create the appropriate interface for them in the shader such that Three.JS can take on the rendering. See, Shadertoy creates all its magic on a 2D plane and displays the ‘texture’ then accordingly in the 3D context. Three.JS is all 3D through and through …
The following sample glues them into one big happy unity and dynamically loads the ( almost never changing ) vertex.shader, and then the fragment.shader code.
<!DOCTYPE html>
<html lang="en">
<head>
        <title>Galaxy</title>
</head>
<body style="background-color: #000000; margin: 0px; overflow: hidden; ">
        <div id="container"></div>
        <script src="three.min.js"></script>

<script>
function fetchFile ( path, callback, ctx )  {
    var httpRequest = new XMLHttpRequest();
    httpRequest.onreadystatechange = function() {
        if (httpRequest.readyState === 4) {
            if (httpRequest.status === 200) {
                if (callback) callback( httpRequest.responseText );
            }
        }
    };
    httpRequest.open('GET', path);
    httpRequest.send();
}

document.loadData = function ( files, clb, ctx, pre )  {
  var rsp  = [];
  var load = function ( list )  {
    if ( list.length === 0 ) {
      if ( clb )
        clb.call ( ctx, rsp );
      return;
    }
    var res = list.shift ( );
    var uri = pre ? pre : ""; uri += res;
    fetchFile ( uri, function ( data )  {
      rsp.push ( data );
      load ( list );
    }, this );
  };
  load ( files );
};

var container;
var camera, scene, renderer;
var uniforms;
var startTime;
var clock;

function init ( vert, frag )  {
  container = document.getElementById( 'container' );
  clock  = new THREE.Clock  ( );
  camera = new THREE.Camera ( );
  scene  = new THREE.Scene  ( );
  camera.position.z = 1;

  var geometry = new THREE.PlaneGeometry( 3, 3 );
  uniforms = {
    iGlobalTime: { type: "f", value: 1.0 },
    iResolution: { type: "v2", value: new THREE.Vector2() }
  };

  var fs = boilerPlate ( 1 ) + frag + boilerPlate ( 2 );
  var material = new THREE.ShaderMaterial( {
    uniforms: uniforms,
    vertexShader:   vert,
    fragmentShader: fs
  } );

  var mesh = new THREE.Mesh( geometry, material );
  scene.add( mesh );

  renderer = new THREE.WebGLRenderer();
  container.appendChild( renderer.domElement );

  onWindowResize();

  window.addEventListener( 'resize', onWindowResize, false );
}

function onWindowResize( event ) {
  uniforms.iResolution.value.x = window.innerWidth;
  uniforms.iResolution.value.y = window.innerHeight;
  renderer.setSize( window.innerWidth, window.innerHeight );
}

function animate ( )  {
  requestAnimationFrame ( animate );
  render ( );
}

function render() {
  uniforms.iGlobalTime.value += clock.getDelta ( );
  renderer.render ( scene, camera );
}

document.loadData ( [ "vertex.shader", "fragment.shader" ], function ( data )  {
  this.init ( data[0], data[1] );
  animate ( );
}, window, "/data/webgl/" );

   function boilerPlate ( part )  {
      var ret = "";
      if ( part === 1 )  {
        ret  = "//#extension GL_OES_standard_derivatives : enable\n";
        ret += "//#extension GL_EXT_shader_texture_lod : enable\n";
        ret += "#ifdef GL_ES\n";
        ret += "precision highp float;\n";
        ret += "#endif\n";
        ret += "uniform vec2      iResolution;\n";
        ret += "uniform float     iGlobalTime;\n";
        ret += "uniform float     iChannelTime[4];\n";
        ret += "uniform vec4      iMouse;\n";
        ret += "uniform vec4      iDate;\n";
        ret += "uniform float     iSampleRate;\n";
        ret += "uniform vec3      iChannelResolution[4];\n";
        ret += "uniform int       iFrame;\n";
        ret += "uniform float     iTimeDelta;\n";
        ret += "uniform float     iFrameRate;\n";
        ret += "struct Channel\n";
        ret += "{\n";
        ret += "    vec3  resolution;\n";
        ret += "    float time;\n";
        ret += "};\n";
        ret += "uniform Channel iChannel[4];\n";
        ret += "uniform sampler2D iChannel0;\n";
        ret += "uniform sampler2D iChannel1;\n";
        ret += "uniform sampler2D iChannel2;\n";
        ret += "uniform sampler2D iChannel3;\n";
        ret += "void mainImage( out vec4 c,  in vec2 f );\n";
      }
      else {
        ret  = "void main( void ){\n";
        ret += "  vec4 color = vec4(0.0,0.0,0.0,1.0);\n";
        ret += "  mainImage( color, gl_FragCoord.xy );\n";
        ret += "  color.w = 1.0;\n";
        ret += "  gl_FragColor = color;\n";
        ret += "}\n";
      }
      return ret;
    }

</script>

        </body>
</html>
varying vec2 vUv;
void main ( )  {
  vUv = uv;
  gl_Position = vec4( position, 1.0 );

}
// Galaxy shader
//
// Created by Frank Hugenroth  /frankenburgh/   07/2015
// Released at nordlicht/bremen 2015

// random/hash function
float hash( float n )
{
  return fract(cos(n)*41415.92653);
}

// 2d noise function
float noise( in vec2 x )
{
  vec2 p  = floor(x);
  vec2 f  = smoothstep(0.0, 1.0, fract(x));
  float n = p.x + p.y*57.0;

  return mix(mix( hash(n+  0.0), hash(n+  1.0),f.x),
    mix( hash(n+ 57.0), hash(n+ 58.0),f.x),f.y);
}

float noise( in vec3 x )
{
  vec3 p  = floor(x);
  vec3 f  = smoothstep(0.0, 1.0, fract(x));
  float n = p.x + p.y*57.0 + 113.0*p.z;

  return mix(mix(mix( hash(n+  0.0), hash(n+  1.0),f.x),
    mix( hash(n+ 57.0), hash(n+ 58.0),f.x),f.y),
    mix(mix( hash(n+113.0), hash(n+114.0),f.x),
    mix( hash(n+170.0), hash(n+171.0),f.x),f.y),f.z);
}

mat3 m = mat3( 0.00,  1.60,  1.20, -1.60,  0.72, -0.96, -1.20, -0.96,  1.28 );

// Fractional Brownian motion
float fbmslow( vec3 p )
{
  float f = 0.5000*noise( p ); p = m*p*1.2;
  f += 0.2500*noise( p ); p = m*p*1.3;
  f += 0.1666*noise( p ); p = m*p*1.4;
  f += 0.0834*noise( p ); p = m*p*1.84;
  return f;
}

float fbm( vec3 p )
{
  float f = 0., a = 1., s=0.;
  f += a*noise( p ); p = m*p*1.149; s += a; a *= .75;
  f += a*noise( p ); p = m*p*1.41; s += a; a *= .75;
  f += a*noise( p ); p = m*p*1.51; s += a; a *= .65;
  f += a*noise( p ); p = m*p*1.21; s += a; a *= .35;
  f += a*noise( p ); p = m*p*1.41; s += a; a *= .75;
  f += a*noise( p );
  return f/s;
}

void mainImage( out vec4 fragColor, in vec2 fragCoord )
{
        float time = iGlobalTime * 0.1;

        vec2 xy = -1.0 + 2.0*fragCoord.xy / iResolution.xy;

        // fade in (1=10sec), out after 8=80sec;
        float fade = 1.0; //min(1., time*1.)*min(1.,max(0., 15.-time));
        // start glow after 5=50sec
        float fade2= 0.37; //max(0., time-10.)*0.37;
        float glow = max(-.25,1.+pow(fade2, 10.) - 0.001*pow(fade2, 25.));


        // get camera position and view direction
        vec3 campos = vec3(500.0, 850., 1800.0 ); //-.0-cos((time-1.4)/2.)*2000.); // moving
        vec3 camtar = vec3(0., 0., 0.);

        float roll = 0.34;
        vec3 cw = normalize(camtar-campos);
        vec3 cp = vec3(sin(roll), cos(roll),0.0);
        vec3 cu = normalize(cross(cw,cp));
        vec3 cv = normalize(cross(cu,cw));
        vec3 rd = normalize( xy.x*cu + xy.y*cv + 1.6*cw );

        vec3 light   = normalize( vec3(  0., 0.,  0. )-campos );
        float sundot = clamp(dot(light,rd),0.0,1.0);

        // render sky

    // galaxy center glow
    vec3 col = glow*1.2*min(vec3(1.0, 1.0, 1.0), vec3(2.0,1.0,0.5)*pow( sundot, 100.0 ));
    // moon haze
    col += 0.3*vec3(0.8,0.9,1.2)*pow( sundot, 8.0 );

        // stars
        vec3 stars = 85.5*vec3(pow(fbmslow(rd.xyz*312.0), 7.0))*vec3(pow(fbmslow(rd.zxy*440.3), 8.0));

        // moving background fog
    vec3 cpos = 1500.*rd + vec3(831.0-time*30., 321.0, 1000.0);
    col += vec3(0.4, 0.5, 1.0) * ((fbmslow( cpos*0.0035 ) - .5));

        cpos += vec3(831.0-time*33., 321.0, 999.);
    col += vec3(0.6, 0.3, 0.6) * 10.0*pow((fbmslow( cpos*0.0045 )), 10.0);

        cpos += vec3(3831.0-time*39., 221.0, 999.0);
    col += 0.03*vec3(0.6, 0.0, 0.0) * 10.0*pow((fbmslow( cpos*0.0145 )), 2.0);

        // stars
        cpos = 1500.*rd + vec3(831.0, 321.0, 999.);
        col += stars*fbm(cpos*0.0021);


        // Clouds
    vec2 shift = vec2( time*100.0, time*180.0 );
    vec4 sum = vec4(0,0,0,0);
    float c = campos.y / rd.y; // cloud height
    vec3 cpos2 = campos - c*rd;
    float radius = length(cpos2.xz)/1000.0;

    if (radius<1.8)
    {
          for (int q=10; q>-10; q--) // layers
      {
                if (sum.w>0.999) continue;
        float c = (float(q)*8.-campos.y) / rd.y; // cloud height
        vec3 cpos = campos + c*rd;

                float see = dot(normalize(cpos), normalize(campos));
                vec3 lightUnvis = vec3(.0,.0,.0 );
                vec3 lightVis   = vec3(1.3,1.2,1.2 );
                vec3 shine = mix(lightVis, lightUnvis, smoothstep(0.0, 1.0, see));

                // border
            float radius = length(cpos.xz)/999.;
            if (radius>1.0)
              continue;

                float rot = 3.00*(radius)-time;
        cpos.xz = cpos.xz*mat2(cos(rot), -sin(rot), sin(rot), cos(rot));

                cpos += vec3(831.0+shift.x, 321.0+float(q)*mix(250.0, 50.0, radius)-shift.x*0.2, 1330.0+shift.y); // cloud position
                cpos *= mix(0.0025, 0.0028, radius); // zoom
        float alpha = smoothstep(0.50, 1.0, fbm( cpos )); // fractal cloud density
                alpha *= 1.3*pow(smoothstep(1.0, 0.0, radius), 0.3); // fade out disc at edges
                vec3 dustcolor = mix(vec3( 2.0, 1.3, 1.0 ), vec3( 0.1,0.2,0.3 ), pow(radius, .5));
        vec3 localcolor = mix(dustcolor, shine, alpha); // density color white->gray

                float gstar = 2.*pow(noise( cpos*21.40 ), 22.0);
                float gstar2= 3.*pow(noise( cpos*26.55 ), 34.0);
                float gholes= 1.*pow(noise( cpos*11.55 ), 14.0);
                localcolor += vec3(1.0, 0.6, 0.3)*gstar;
                localcolor += vec3(1.0, 1.0, 0.7)*gstar2;
                localcolor -= gholes;

        alpha = (1.0-sum.w)*alpha; // alpha/density saturation (the more a cloud layer\\\'s density, the more the higher layers will be hidden)
        sum += vec4(localcolor*alpha, alpha); // sum up weightened color
          }

          for (int q=0; q<20; q++) // 120 layers
      {
                if (sum.w>0.999) continue;
        float c = (float(q)*4.-campos.y) / rd.y; // cloud height
        vec3 cpos = campos + c*rd;

                float see = dot(normalize(cpos), normalize(campos));
                vec3 lightUnvis = vec3(.0,.0,.0 );
                vec3 lightVis   = vec3(1.3,1.2,1.2 );
                vec3 shine = mix(lightVis, lightUnvis, smoothstep(0.0, 1.0, see));

                // border
            float radius = length(cpos.xz)/200.0;
            if (radius>1.0)
              continue;

                float rot = 3.2*(radius)-time*1.1;
        cpos.xz = cpos.xz*mat2(cos(rot), -sin(rot), sin(rot), cos(rot));

                cpos += vec3(831.0+shift.x, 321.0+float(q)*mix(250.0, 50.0, radius)-shift.x*0.2, 1330.0+shift.y); // cloud position
        float alpha = 0.1+smoothstep(0.6, 1.0, fbm( cpos )); // fractal cloud density
                alpha *= 1.2*(pow(smoothstep(1.0, 0.0, radius), 0.72) - pow(smoothstep(1.0, 0.0, radius*1.875), 0.2)); // fade out disc at edges
        vec3 localcolor = vec3(0.0, 0.0, 0.0); // density color white->gray

        alpha = (1.0-sum.w)*alpha; // alpha/density saturation (the more a cloud layer\\\'s density, the more the higher layers will be hidden)
        sum += vec4(localcolor*alpha, alpha); // sum up weightened color
          }
    }
        float alpha = smoothstep(1.-radius*.5, 1.0, sum.w);
    sum.rgb /= sum.w+0.0001;
    sum.rgb -= 0.2*vec3(0.8, 0.75, 0.7) * pow(sundot,10.0)*alpha;
    sum.rgb += min(glow, 10.0)*0.2*vec3(1.2, 1.2, 1.2) * pow(sundot,5.0)*(1.0-alpha);

        col = mix( col, sum.rgb , sum.w);//*pow(sundot,10.0) );

    // haze
        col = fade*mix(col, vec3(0.3,0.5,.9), 29.0*(pow( sundot, 50.0 )-pow( sundot, 60.0 ))/(2.+9.*abs(rd.y)));

    // Vignetting
        vec2 xy2 = gl_FragCoord.xy / iResolution.xy;
        col *= vec3(.5, .5, .5) + 0.25*pow(100.0*xy2.x*xy2.y*(1.0-xy2.x)*(1.0-xy2.y), .5 );

        fragColor = vec4(col,1.0);
}
And now to AstraNOS
At this point we are almost at the point of adding it as a background to AstraNOS. I have to plugin the code into a QooxDoo base class called qx.core.Object and we are good to go.

And as usual you can go and play with the actual code Here …


