Tag Archives: Raspberry PI Zero W

Custom Video Doorbell box

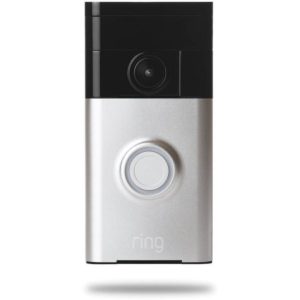
When I first <a href=”https://www.softwaresamurai.org/2017/10/10/raspberry-pi-video-doorbell/”>looked into adding a Video Doorbell</a> I was surprised by the lack of available choices ( thus far )

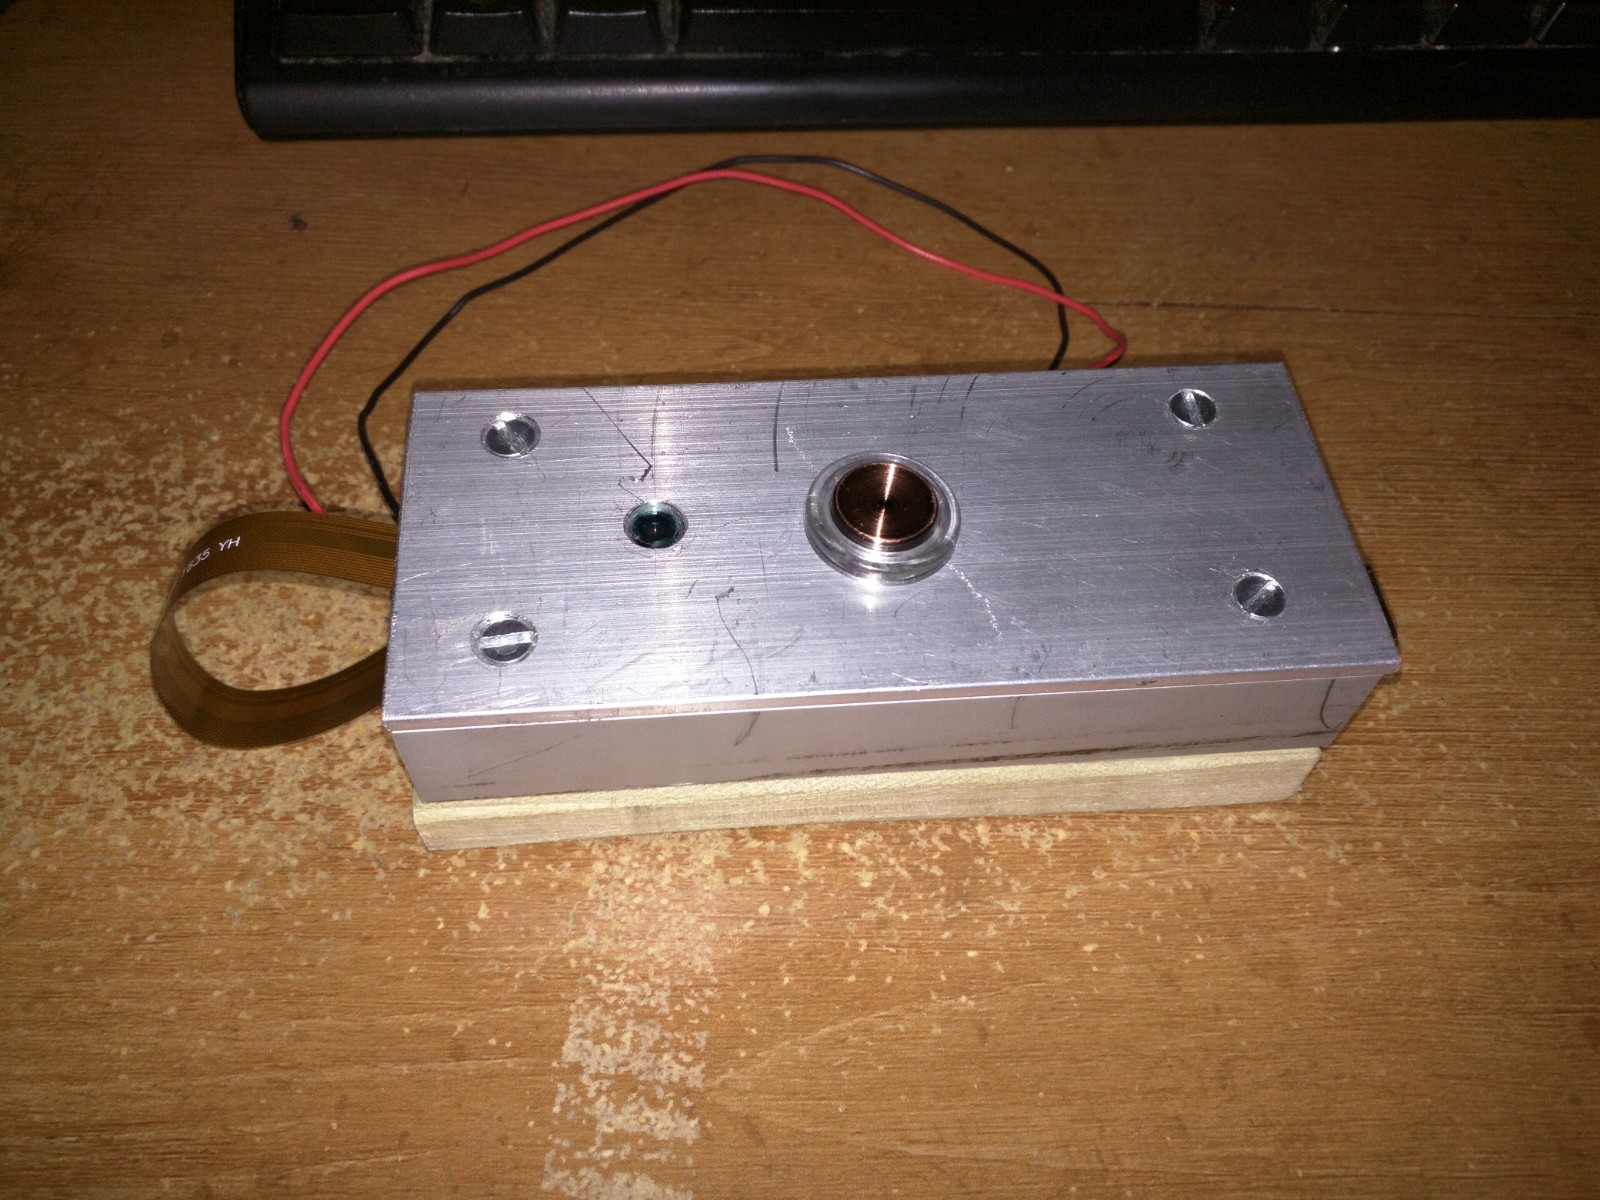
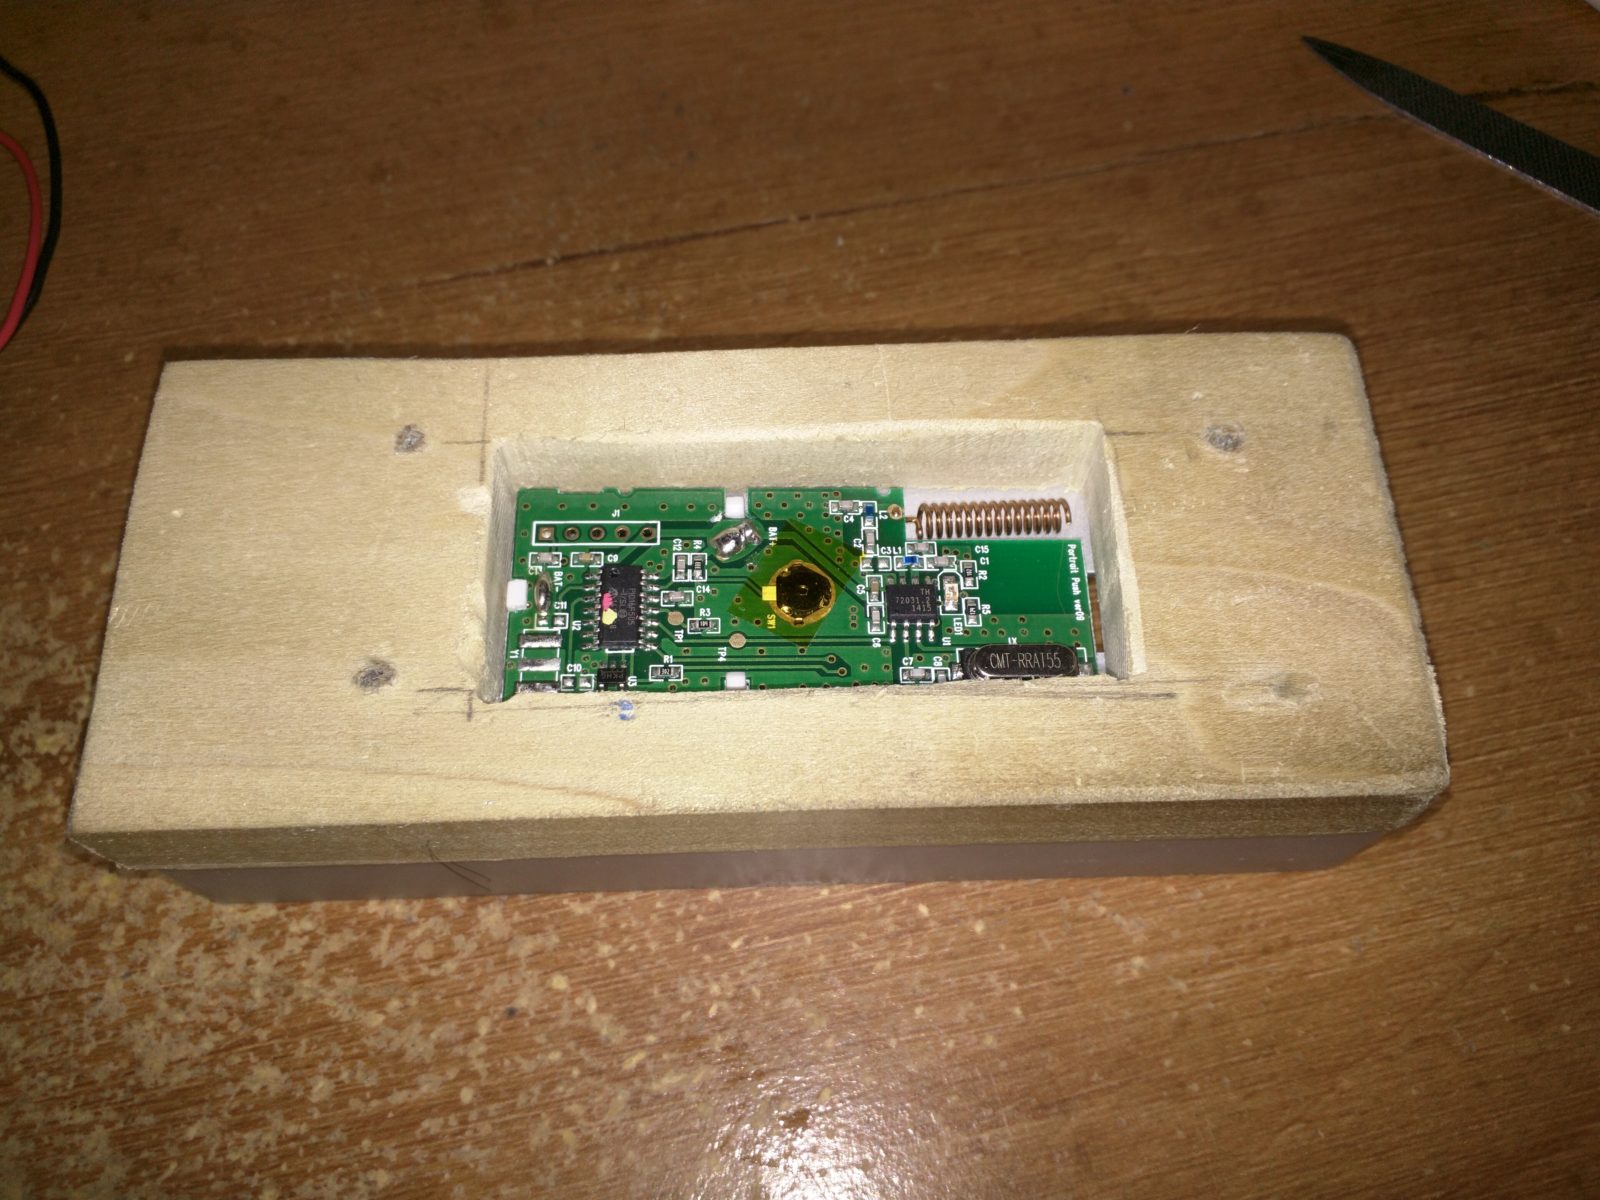
Our doorbell had to be slender which meant less than 2″ ( 50mm ) and could be 4.8″ tall ( 123mm ). None of the ones I saw met this criteria. I also required a little 5mm shim to handle the uneven surface.

Anyways long story short I decided to do a custom build of the chassis for the Doorbell.

Rough drawing of the chassis

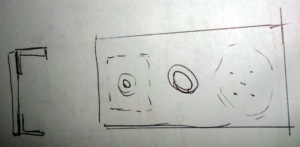
Creating the Custom Video Doorbell:

To convert this image into a physical reality I had to use some tools and then see if all eventually fits in. To screw the top and the bottom together will be the very last step before painting, after I have places, screwed, soldered and glued all the pieces into their final place. This will allow me to adjust the height if needs be.

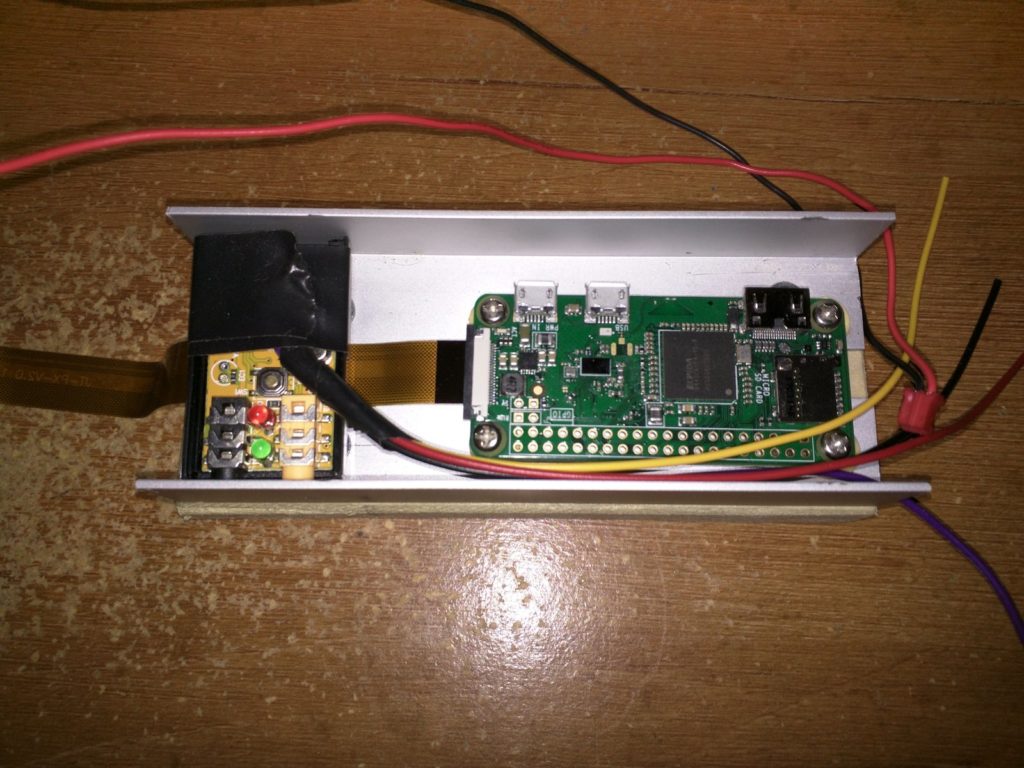
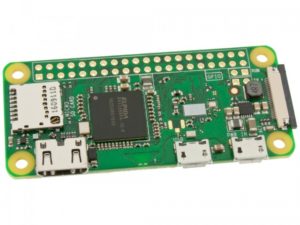
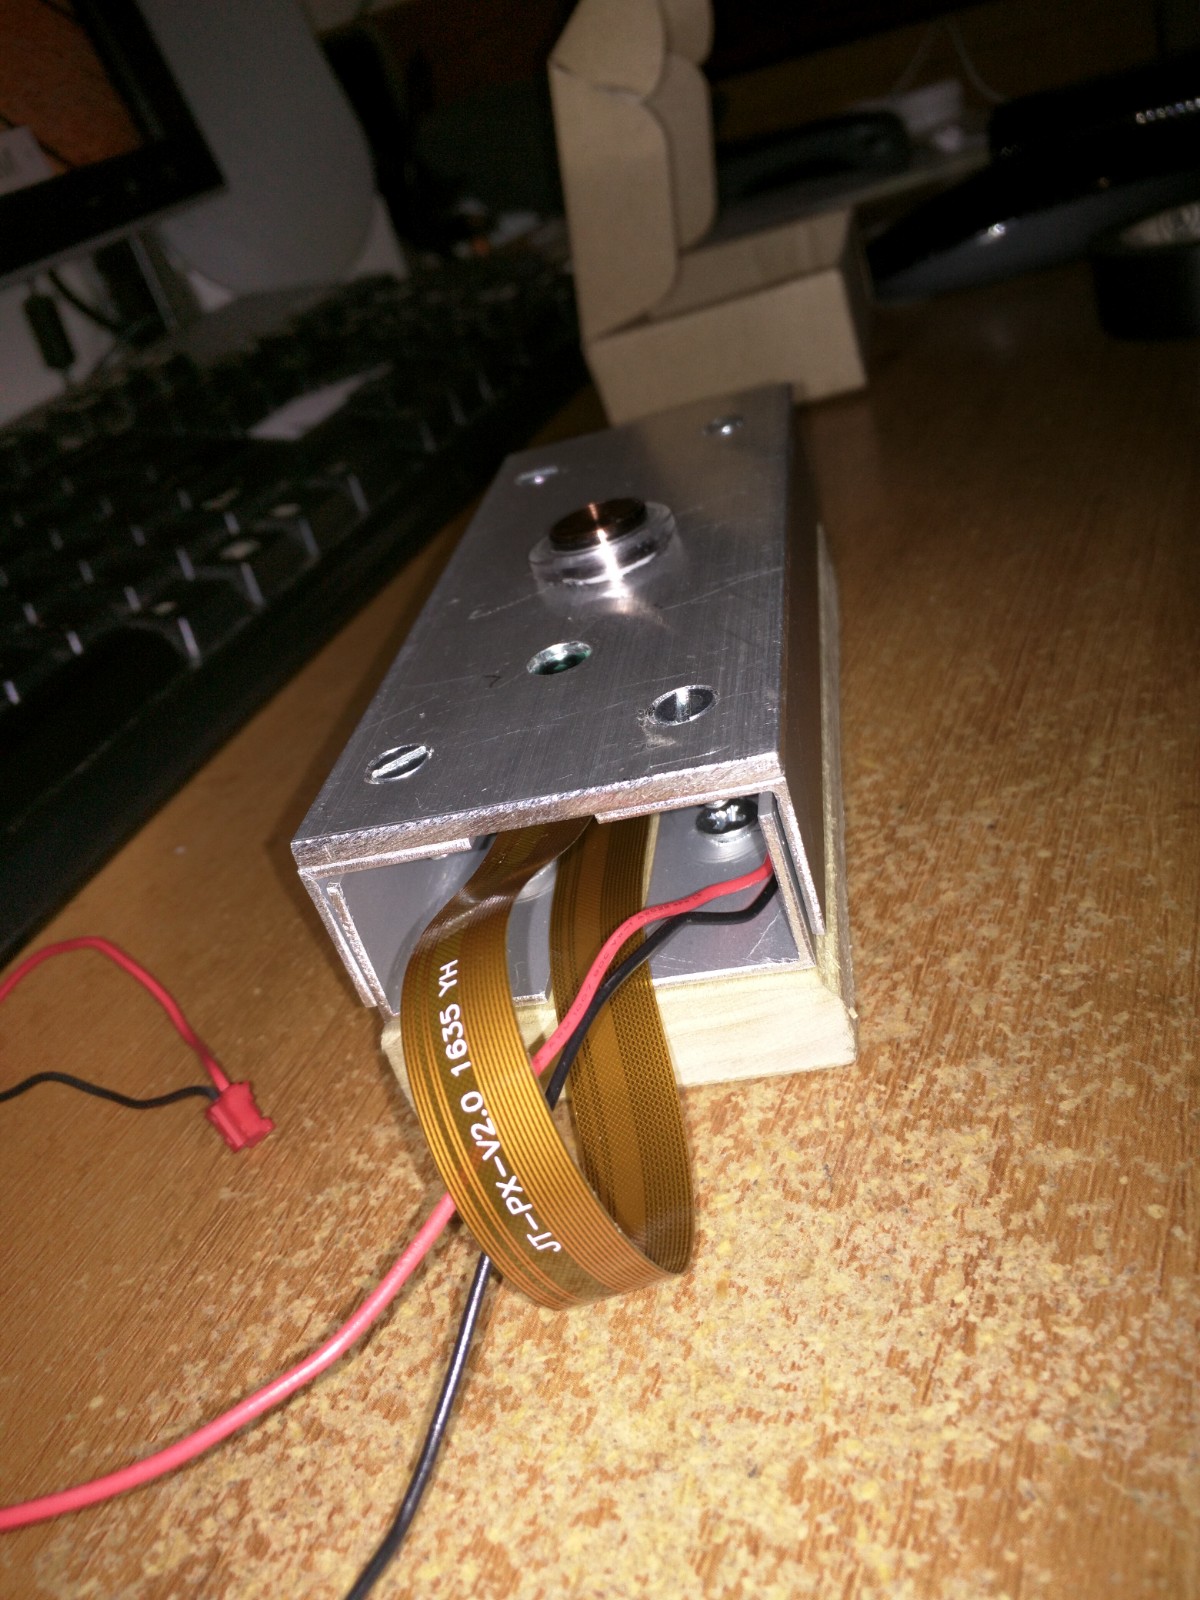
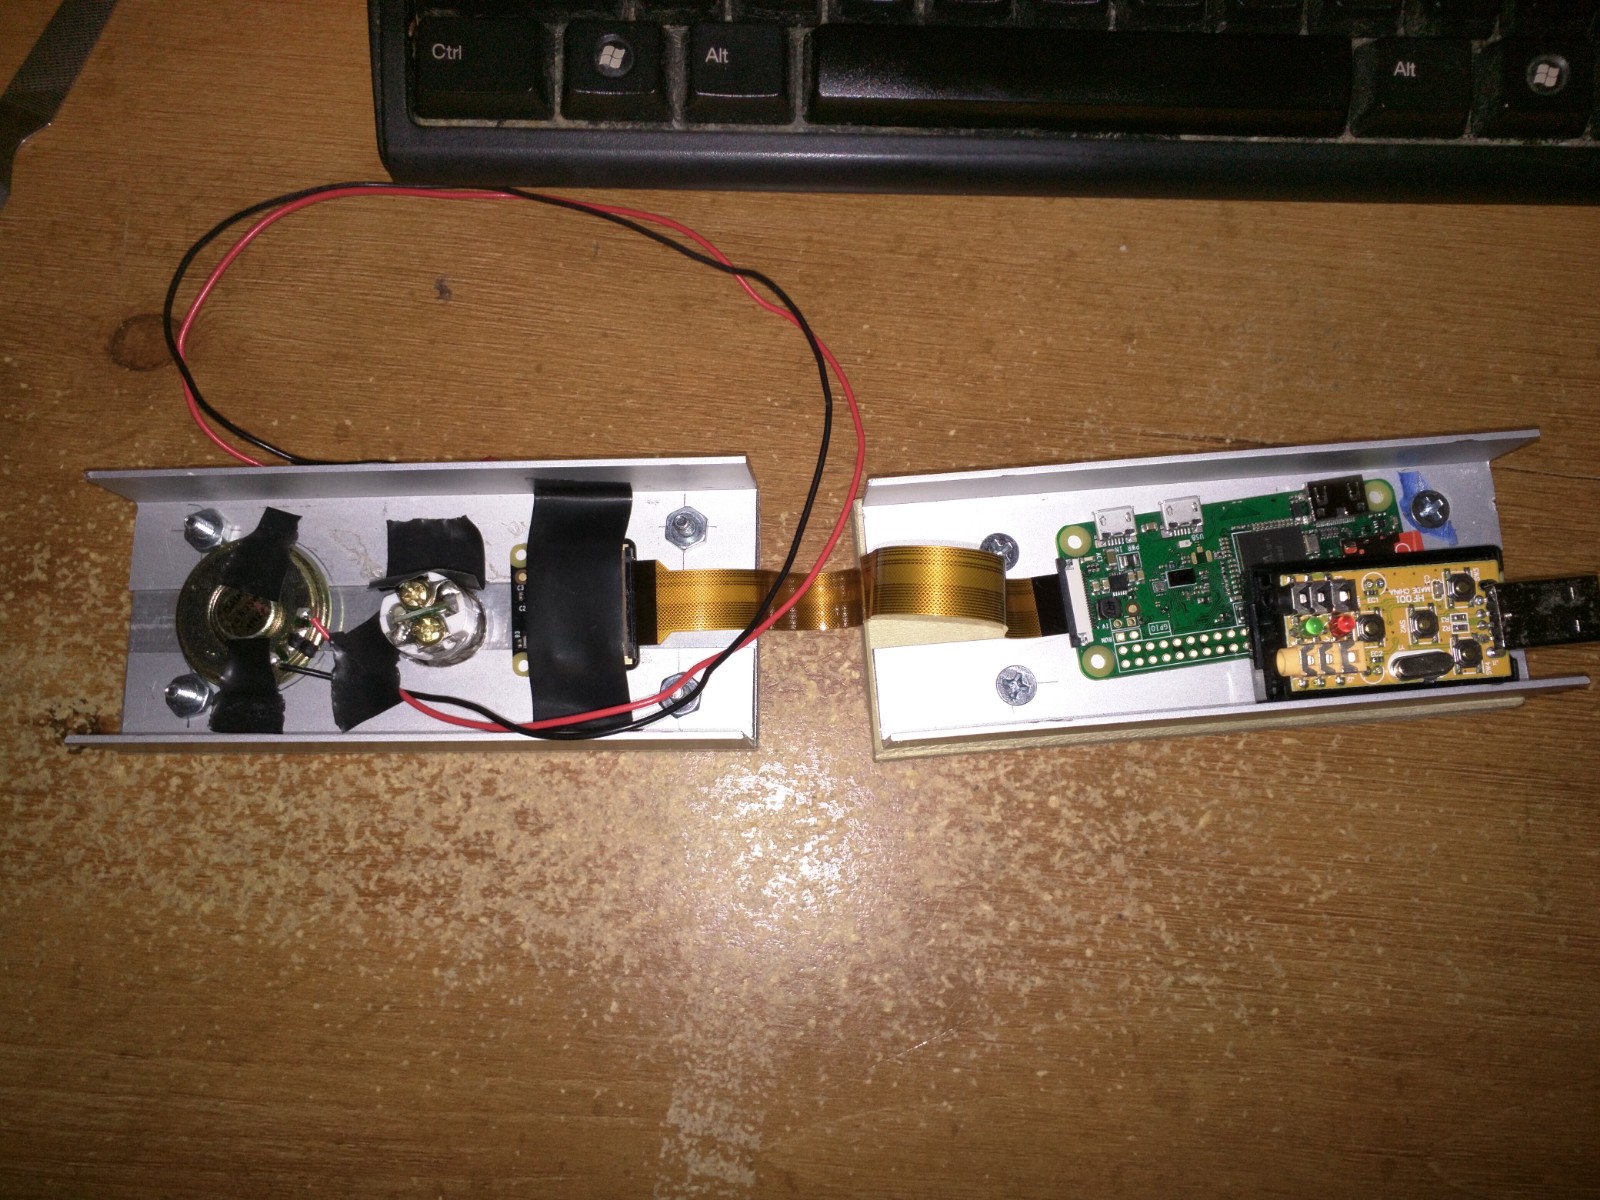
From the pictures below you can see that it is a tight fit with all the pieces in place. Unfortunately I can’t use the USB plugs. If I would connect them, then the PI Zero would no longer fit inside the box.

Since the PI Zero exposes the usb contacts on the bottom and I have to remove the USB plug from the soundcard anyways.
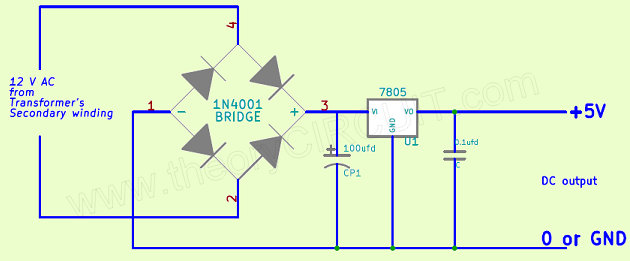
  • All pieces put tgether
    All pieces put tgether
    This is the assembled Raspberry PI with camera, the New doorbell button, the sound card, loudspeaker, as well as the original wireless doorbell button.
  • Side View
    Side View
    The assembled pieces from the side
  • top and bottom part of the doorbell
    top and bottom part of the doorbell
    Please note that the tape is just a temporary holder until I create all required holes, brakets etc.
  • The sound card fits in sidewards
    The sound card fits in sidewards
    After removing the USB plug and soldering on the wires, The sound card does now fit sidewards into the chassis.
  • Wireless Doorbell button
    Wireless Doorbell button
    Before cutting out the back to place the current wireless Doorbell Button into its socket.
  • Wireless Button integrated into back of Doorbell
    Wireless Button integrated into back of Doorbell
    All fits snug into their place.


Power

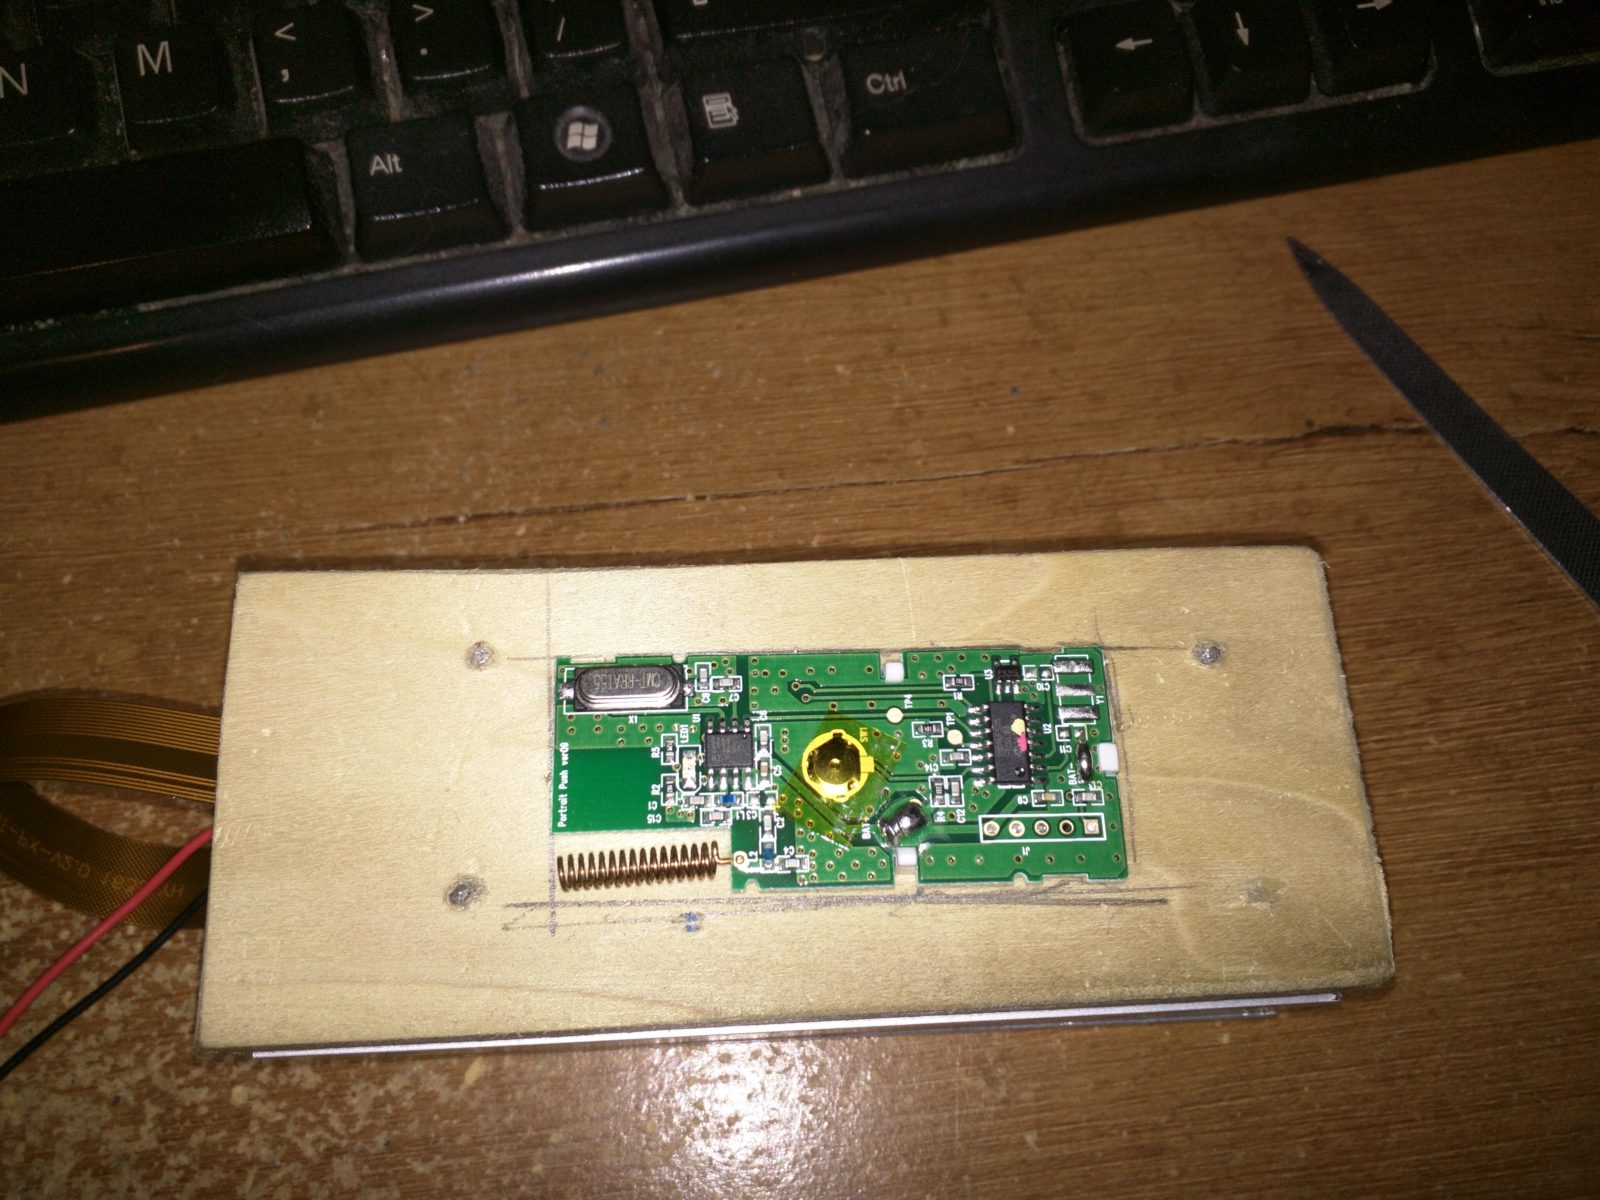
As power source we do have 24V AC coming out of the doorframe, which require a small power converter. Using the standard 7805 regulator brings this down to a few small pieces. Alternatively I can find the source fo the wiring and feed it directly with 5V DC to the door.

7805 voltage regulator
7805 voltage regulator schematic

Things are starting to come together. I still have to connect the loudspeaker, the microphone, and make sure that the original doorbell button gets some protection before connecting it up and closing the case.

Cheap $7,- external usb sound card

I bought the following external usb sound card from Amazon for $7,- to integrate into my Video Doorbell project.


External USB sound card

So why did I chose to go this route. Simple, I was looking at some audio pHATs  for the Raspberry PI and found that they will cost about $4,- a pop, then of course you also need a microphone, and bang you are at around $9,- to $10,-. So paying $7,- for a audio I/O ( 7.1 sound card ) is a smart choice. Another thing I saw which won me over was that the setup is quit simple.

Note: This link above will point to the same sound card for only $4,-.

In order to do the setup I connected a micro-USB male to USB female adapter to my PI zero and made two small changes.
Please note though that I do intend to remove the USB plug all together and solder things together in the final setup.

1: Find the US sound card number ( in my case the USB card is card # 1 )

aplay -l
**** List of PLAYBACK Hardware Devices ****
card 0: ALSA [bcm2835 ALSA], device 0: bcm2835 ALSA [bcm2835 ALSA]
Subdevices: 8/8
Subdevice #0: subdevice #0
Subdevice #1: subdevice #1
Subdevice #2: subdevice #2
Subdevice #3: subdevice #3
Subdevice #4: subdevice #4
Subdevice #5: subdevice #5
Subdevice #6: subdevice #6
Subdevice #7: subdevice #7
card 0: ALSA [bcm2835 ALSA], device 1: bcm2835 ALSA [bcm2835 IEC958/HDMI]
Subdevices: 1/1
Subdevice #0: subdevice #0
card 1: Set [C-Media USB Headphone Set], device 0: USB Audio [USB Audio]
Subdevices: 1/1
Subdevice #0: subdevice #0

2: create a file /etc/asound.conf with the following contents

pcm.!default {
        type hw
        card 1
}

ctl.!default {
        type hw
        card 1
}

3: and finally test the speaker :

  speaker-test -c2 -twav

This concluded the setup and testing. To use this external USB sound card in my project it had to fit tightly into the chassis which I built from scratch. So the USB plug had to come off and I had to solder some wires onto the card to connect t up to the Raspberry PI.

Video Doorbell assembly
external USB soundcard after removal of USB plug

Raspberry PI Zero W as Chromecast

So one of the thing which I tried out was to see if the PI Zero can handle video streaming to our TV.

In order to setup the Raspberry PI Zero W as Chromecast, I followed the series of 7 videos below and plugged it into our large TV. However the result was unusable. The video did only play for a second or two before the whole thing stopped and tried to continue playing.

This is not too surprising considering that the PI Zero has only a single core 1GHz CPU while the instructions assume the PI 2 or 3 which has a quad core CPU to handle the stress.

Step 1 : Raspbian Jessie Lite Install Guide
https://youtu.be/R9UDL1JxP7I

Step 2: Raspbian Jessie Lite wifi config
https://youtu.be/N2ZjrBC2bv0

Step 3 : Raspbian update upgrade omxplayer
https://youtu.be/JV7nbAsQKO0

Step 4 : Install youtube download video and python
https://youtu.be/ukujbwn7XiQ

Step 5 : Raspbian Jessie Lite Golang
https://youtu.be/gVhMYRaKGXU

Step 6 : Raspberry pi as Youtube TV
https://youtu.be/dWjfkwz6MWk

Please feel free to sign up or follow my home made hardware projects here …

Loading

Raspberry PI Video Doorbell

I recently went to a Microcenter near by and bought an Raspberry PI Zero W

Raspberry Pi Zero W
Raspberry Pi Zero W

For $5,- I could simply not resist. Not only is this a full blown computer with micro-hdmi out, it also can be used to connect other hardware to it with ease. The connector on the right is there to connect a camera to the PI Zero.
Well, after installing raspbian onto a micro-SD card, I went ahead and bought a camera as open-box item for only $12,- and got the combo to work in no time flat.

That is all well and good but what can you truly do with this hardware ? The answer for me is/was

Home Automation.

I have looked into

Ring Video Doorbell
Ring Video Doorbell

However my issue was not so much the price of these devices, after all it takes a lot of effort and money to develop a great product, it was the physical shape and size which made any of the available products unusabe for me.

So I thought I would simply add a few pieces together and create my own Video Doorbell from scratch using the PI and a few other software and hardware parts, which can be found online.

It is of course very helpful, that there is such a huge community behind the PI and that almost everything you can come up with has been attempted before. So googling around I found a bunch of sites with similar goals, like this one here.

Raspberry Pi Security System

Here are the next steps to get from idea to finished project.

  1. Building the chassis ( and BOM )
  2. Connecting the camera
  3. Adding microphone and speaker
  4. Installing a notification server ( pushd )
  5. Writing a cross platform app ( iOS / Android )
  6. Connecting all the pieces

Feel free to subscribe to my blog

Loading